lee esto en español 
Managing a project requirements is no easy task. But where that difficulty lies, in gathering or documenting these requirements? It's two sides of the same coin, and in the end, good managing of both things will define a project success.
There are a lot of methodologies to gather requirements, as many as flavors. Maybe RUP is the most famous for large projects, and Agile variants are for smaller ones. Whatever the chosen methodology is, the available tools for managing requirements plainly suck.
The king of requirement tool, RequisitePro, it's an outdated mix of MsWord and a proprietary application, together with a reporting tool (SODA) in MsWord. Not at all agile. Maybe the new Jazz development will bright things for Rational, but we're at least 2 years away from it. What's left for requirements documentation? Maybe Enterprise Arquitect it's good at it, but still a heavy client.
So, welcome to the web! If he most popular distributed document system nowadays is wikipedia, then why not document a project in a wiki? The first argument against it would be that information in a wiki is very unstructured, but there are some tools that allow to add control to the input forms and data editing. XWiki is such an example, but today I'm going to write about something made with Confluence and a few plugins available for this platform.
Step 1. Create a "Client" document template.
First we will create a template to store the clients data. To keep things simple, we'll just store the name. We will have to go to "Browse Space/Advanced/Templates/Add New Space Template" and add the following code and save it with the name "Client".
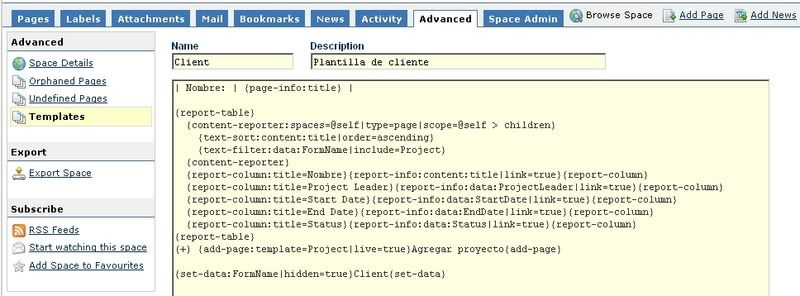
| Name: | {page-info:title} |

{report-table}
{content-reporter:spaces=@self|type=page|scope=@self > children}
  {text-sort:content:title|order=ascending}
  {text-filter:data:FormName|include=Project}
{content-reporter}
{report-column:title=Name}{report-info:content:title|link=true}{report-column}
{report-column:title=Project Leader}{report-info:data:ProjectLeader|link=true}{report-column}
{report-column:title=Start Date}{report-info:data:StartDate|link=true}{report-column}
{report-column:title=End Date}{report-info:data:EndDate|link=true}{report-column}
{report-column:title=Status}{report-info:data:Status|link=true}{report-column}
{report-table}
(+) {add-page:template=Project|live=true}Add project{add-page}

{set-data:FormName|hidden=true}Client{set-data}
In this template we see a table with the document title, a projects report and a link to add a new project. At last, the tag {set-data} from the Scaffolding,
plugin allows us to identify the document with the property "FormName=Client", facilitating the client reports we will want to do.
Step 2. Crate a root document.
After that we need a page somewhere on our wiki, containing the client listing. To make the report we will use the Reporting plugin:

{report-table}
{content-reporter:spaces=@self|type=page|scope=Clients > children}
  {text-sort:content:title|order=ascending}
{content-reporter}
{report-column:title=Name}{report-info:content:title|link=true}{report-column}
{report-table}

(+) {add-page:template=Client|live=true}Add client{add-page}
At the end of the page there's the tag {add-page}, to add client type documents with the previously created template:
Step 3. Add a client.
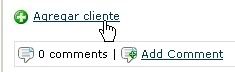
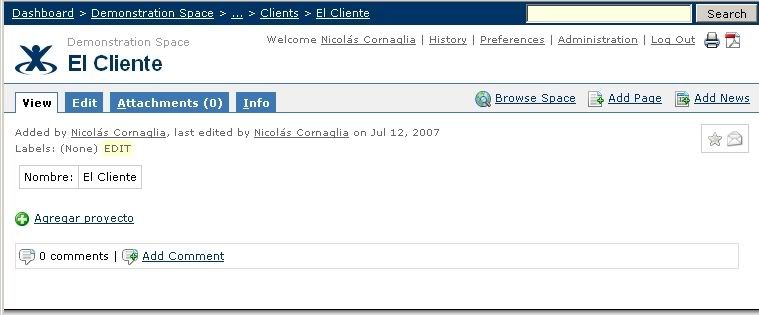
The previous link will show us a "client template" based new document:

After saved it will look like this:
Step 4. Create the "project" template
Analogous, to create a project we will have to create first a template, with title “Project”:
| Name: | {page-info:title} |
| Client: | {report-link:content:parent > content:url}{report-info:key=content:parent}{report-link} |
| JIRA Code | {text-data:JiraCode|content=text|width=100px}{text-data} |
| Project Leader: | {list-data:ProjectLeader|required=true}
{user-options:groups=confluence-users}
{list-data} |
| Team Members: | {list-data:TeamMembers|type=check|multiple=true}
{user-options:confluence-users}
{list-data} |
| Start Date: | {date-data:StartDate|format=dd-MMM-yyyy}today{date-data} |
| End Date: | {date-data:EndDate|format=dd-MMM-yyyy}{date-data} |
| Status: | {list-data:Status}
{list-option}Unstarted{list-option}
{list-option}In progress{list-option}
{list-option}Awaiting approval{list-option}
{list-option}Completed{list-option}
{list-data} |

[Requerements|Requirements]
[Use Cases|UseCases]
[Iterations|Iterations]
[Meeting Minutes|MeetingMinutes]
[Status Reports|StatusReports]

{set-data:FormName|hidden=true}Project{set-data}
This template have the project data, including the project leader, team members, start and end date and status. At the end also we have links to documents that will act as parents to the requirements, iterations and all the rest of the documents our methodology needs.
Step 5. Create a project.
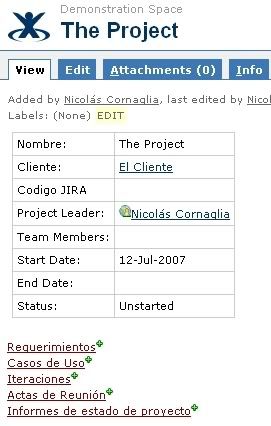
After created the project template we can create project documents, with the link at the end of the client form:

It will ask for the project title, and then the data specified in the template:

After saved it will have the following appearance:
Step 6. The requirements report.
To have a requierements list in each project is left as an excercise, since currently the project template simply contains a link to a generic page called "Requirements": [Requirements|Requirements]. The best option is to use a different space for each project.
But let's continue with the design of the mentioned "Requirements" parent page:
h3.Functional Requirements
{report-table}
{content-reporter:type=page|scope=@self > children}
  {text-sort:data:Date|order=ascending}
  {text-filter:data:FormName|include=Requirement}
  {text-filter:data:Type|include=Functional}
{content-reporter}
{report-column:title=Title}{report-info:content:title|link=true}{report-column}
{report-column:title=State}{report-info:data:State}{report-column}
{report-column:title=Priority}{report-info:data:Priority}{report-column}
{report-column:title=Owner}{report-info:data:Owner}{report-column}
{report-column:title=Added}{report-info:content:creation date}{report-column}
{report-column:title=Added by}{report-info:content:creator}{report-column}
{report-table}

h3.Non Functional Requirements
{report-table}
{content-reporter:type=page|scope=@self > children}
  {text-sort:data:Date|order=ascending}
  {text-filter:data:FormName|include=Requirement}
  {text-filter:data:Type|include=Non Functional}
{content-reporter}
{report-column:title=Title}{report-info:content:title|link=true}{report-column}
{report-column:title=State}{report-info:data:State}{report-column}
{report-column:title=Priority}{report-info:data:Priority}{report-column}
{report-column:title=Owner}{report-info:data:Owner}{report-column}
{report-column:title=Added}{report-info:content:creation date}{report-column}
{report-column:title=Added by}{report-info:content:creator}{report-column}
{report-table}

(+) {add-page:template=Requirement|live=true}Add requirement{add-page}
The page has been divided in functional and nonfunctional requirements, but that could be changed to meet our needs. What we need to know is that the page lists the "Requirement" type of document, created in turn from the "Requirement" template:
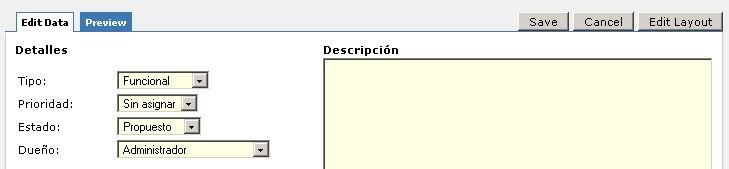
Step 7. The requirements form:
{section}
{column:width=300px}

*Details*
{table:width=300px}

  {table-row}
    {table-cell}
      Tipo:
    {table-cell}
    {table-cell}
      {list-data:Type|required=true}
        {list-option}Functional{list-option}
        {list-option}Non Functional{list-option}
      {list-data}
    {table-cell}
  {table-row}
  {table-row}
    {table-cell:width=100px}
      Prioridad:
    {table-cell}
    {table-cell:width=200px}
      {list-data:Priority}
        {list-option}Non assigned{list-option}
        {list-option}High{list-option}
        {list-option}Medium{list-option}
        {list-option}Low{list-option}
      {list-data}
    {table-cell}
  {table-row}
  {table-row}
    {table-cell:width=100px}
      State:
    {table-cell}
    {table-cell:width=200px}
      {list-data:State}
        {list-option}Proposed{list-option}
        {list-option}Rejected{list-option}
        {list-option}Approved{list-option}
        {list-option}Differed{list-option}
      {list-data}
    {table-cell}
  {table-row}
  {table-row}
    {table-cell}
      Dueño:
    {table-cell}
    {table-cell}
      {list-data:Owner|required=true}{user-options:groups=confluence-users}{list-data}
    {table-cell}
  {table-row}

{table}

{column}
{column:width=90%}
*Description*
{text-data:Description|type=area|content=wiki|width=100%|height=500px}
{column}

{section}

{set-data:FormName|hidden=true}Requirement{set-data}
The result is the form:
And a report of all the requirements:
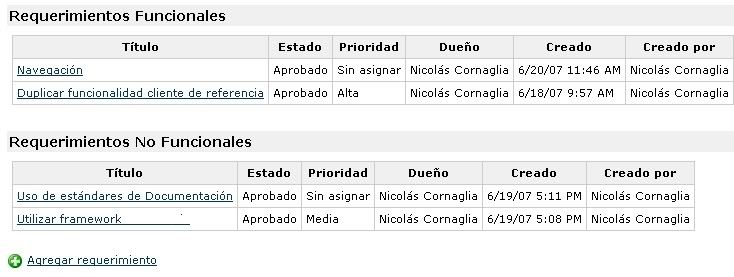
Only left to say is that the Graphviz plugin allow us to make diagrams without go out of the wiki (see UML class diagrams in Confluence using Graphviz and DOT), what increases the agility of the documentation by several degrees and allows graphs like this:

1 comment:
Hi Niko,
Great Post.
I would really like to get your feedback on GreenPepper (http://www.greenpeppersoftware.com).
GreenPepper allows to write Executable Specifications and is integrated in Confluence, Eclips and Jira (Visual Studio for .NET development).
You can have a look at our web site and we could do a webex session to discuss and show you the solution.
~François
mailto:fbeauregard@pyxis-tech.com
Post a Comment